Switching from Android to iPhone is an exciting journey, but moving all your contacts over can feel like a challenge. Don’t worry, though! There are several easy ways to let you know how to transfer contacts from Android to an iPhone. Whether you prefer using Google sync, the Move to iOS app, VCF files, or your SIM card, we’ve got you covered with simple, clear steps to ensure a smooth transition.
Why You Need to Transfer Contacts from Android to iPhone
When switching to a new iPhone, the first thing you’ll want to do is transfer your contacts. After all, contacts are how you stay in touch with friends, family, and colleagues, and keeping them accessible on your new device is essential. Thankfully, you don’t have to start from scratch. By transferring your contacts from Android to iPhone, you ensure that no important details—like phone numbers and email addresses—get lost in the process.
How to Shift Contacts from Android to iPhone: 4 Easy Ways
There are several ways to transfer contacts from Android to iPhone, and we’ll walk you through the best options. Here are four methods on how to migrate Android contacts to iPhone, each with simple instructions to make the process as smooth as possible.
Method 1: Google Account Sync (Recommended)
Using your Google account to sync contacts is one of the simplest and most effective ways to transfer them to your new iPhone. If you already have your contacts stored in Google, this method is quick and hassle-free.
On Android: Sync Contacts with Google Account
- Open the Settings app on your Android phone.
- Scroll down and select Accounts.
- Tap on your Google account.
- Make sure Contacts is turned on for sync.
- Wait a few moments for the contacts to sync.
On iPhone: Add Google Account to iPhone
- Open Settings on your iPhone.
- Scroll down and tap Contacts.
- Tap Accounts and then Add Account.
- Choose Google from the list.
- Enter your Google credentials and turn on Contacts.
- Tap Save.
Your Android contacts should now sync to your iPhone via your Google account. This method is reliable and works well if you’ve already been using Google services for contact storage.
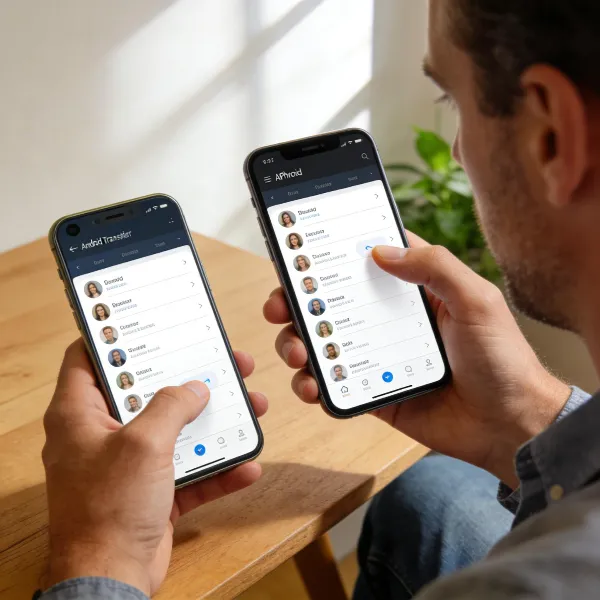
Method 2: Move to iOS App (During Initial Setup)
Apple’s Move to iOS app makes the process of transferring contacts easy, especially if you’re setting up a new iPhone. This app allows you to move not only contacts, but also other data, all in one go.
On iPhone: Start the Setup Process
- Turn on your iPhone and start the setup process.
- On the Apps & Data screen, select Move Data from Android.
- Follow the instructions to download the Move to iOS app on your Android phone.
On Android: Use the Move to iOS App
- Download and install the Move to iOS app from the Google Play Store.
- Open the app and agree to the terms and conditions.
- Enter the code displayed on your iPhone to connect the two devices.
- Choose Contacts from the list of data to transfer.
- Tap Next and wait for the transfer to finish.
This method works best when you’re setting up a new iPhone and want to move all your data, including contacts, from your Android phone.
Method 3: VCF File (Manual Export/Import)
If you want more control over the transfer process, exporting your contacts to a VCF file is another good option. This method is ideal if you only need to transfer a specific set of contacts, or if you prefer not to use cloud-based services.
On Android: Export Contacts to a VCF File
- Open the Contacts app on your Android phone.
- Tap the three-dot menu in the top-right corner.
- Select Import/Export.
- Choose Export to .VCF file and save the file either on your phone or SD card.
On iPhone: Import Contacts from VCF File
- Email the VCF file to your iPhone or transfer it using a file-sharing app.
- Open the email or the file containing the VCF file on your iPhone.
- Tap the VCF file to open it.
- Your iPhone will prompt you to add the contacts—tap Add All Contacts.
This manual method works great if you need to import a smaller batch of contacts, or if you’re not keen on syncing via cloud services.
Need help with your iPhone email setup? Check out our guide on how to add Outlook calendar to iPhone.
Method 4: SIM Card (If Applicable)
If your contacts are saved to your SIM card, transferring them to your new iPhone is straightforward. This method is particularly useful if you want a quick, no-fuss solution for transferring your phone numbers.
On Android: Export Contacts to SIM Card
- Open the Contacts app on your Android phone.
- Tap the three-dot menu and select Import/Export.
- Choose Export to SIM card.
- Wait for the process to complete.
On iPhone: Import Contacts from SIM Card
- Insert the SIM card into your iPhone.
- Open the Settings app on your iPhone.
- Scroll down and tap Contacts.
- Tap Import SIM Contacts.
- Wait for the contacts to transfer.
This method is great for transferring basic contact information stored on your SIM card, though it doesn’t support additional details like email addresses or profile pictures.

Which Method Is Best for You?
Now we know how to take contacts from Android to iPhone with the steps above. And each of these methods has its own set of advantages, depending on your needs and preferences. Let’s break down the pros and cons of each option:
- Google Account Sync: Ideal for those who already sync their contacts with Google. It’s a cloud-based solution that ensures all your contacts are always up-to-date on both devices.
- Move to iOS App: Great for users setting up a new iPhone who want to transfer everything (contacts, photos, apps, etc.) in one go.
- VCF File: Perfect for users who prefer manual control or only need to transfer specific contacts.
- SIM Card: Best for those who want a quick, basic solution for transferring phone numbers, though it’s limited to SIM-stored contacts only.
Conclusion
When it comes to transferring contacts from Android to iPhone, you have several options to choose from. Whether you decide to sync through Google, use the Move to iOS app, transfer via a VCF file, or rely on your SIM card, each method is straightforward and effective. The best option for you depends on your personal preferences and how much data you need to transfer. If you want the easiest method, Google Account Sync is the way to go, while the Move to iOS app is perfect for those setting up a new iPhone.